
(Tutorial Video is at the Bottom of the Page)
It is a staple in the storytelling language of the action adventure film. When your hero has to travel a long distance, you simply cut to a map, and show the path the hero is taking to get there.
This was famously done in the Indiana Jones series, and countless other films. Whether your hero is flying, sailing or driving. Showing the map is a very effective way to get your character across long distances with minimal explanation.
So how do you do it? Well we are going to look at that from start to finish.
Getting a Map
 Obviously, getting a map is going to depend on the story you are working with. Is your character a globe trotter, or just traveling across town? The biggest issue you will face is getting an image that is high enough resolution. This is especially true if you want to travel around on the map. To avoid that problem, I decided to make sure I had a vector map.
(for those that don’t know, computers process images in 2 ways, raster and vector. Most video, and photos are raster. 1 pixel is equal to one color. Vector on the other hand is not pixels. It is a mathematic algorithm. Therefore you can change the size as much as you want, without image quality loss).
I started out with a standard map of the Caribbean. I then opened the map in Photoshop and filled in all of the “states” so I had a solid image of land.
Then I took the photo into Illustrator and traced it. (this makes the image vector). I then set the colors how I wanted them, and took the Illustrator file into After Effects.
Making a Flight Path in After Effects
After creating your After Effects composition, you want to place your illustrator file, and scale it properly. Make sure the button is on to continuously rasterize the vector file so you have nice, sharp edges.
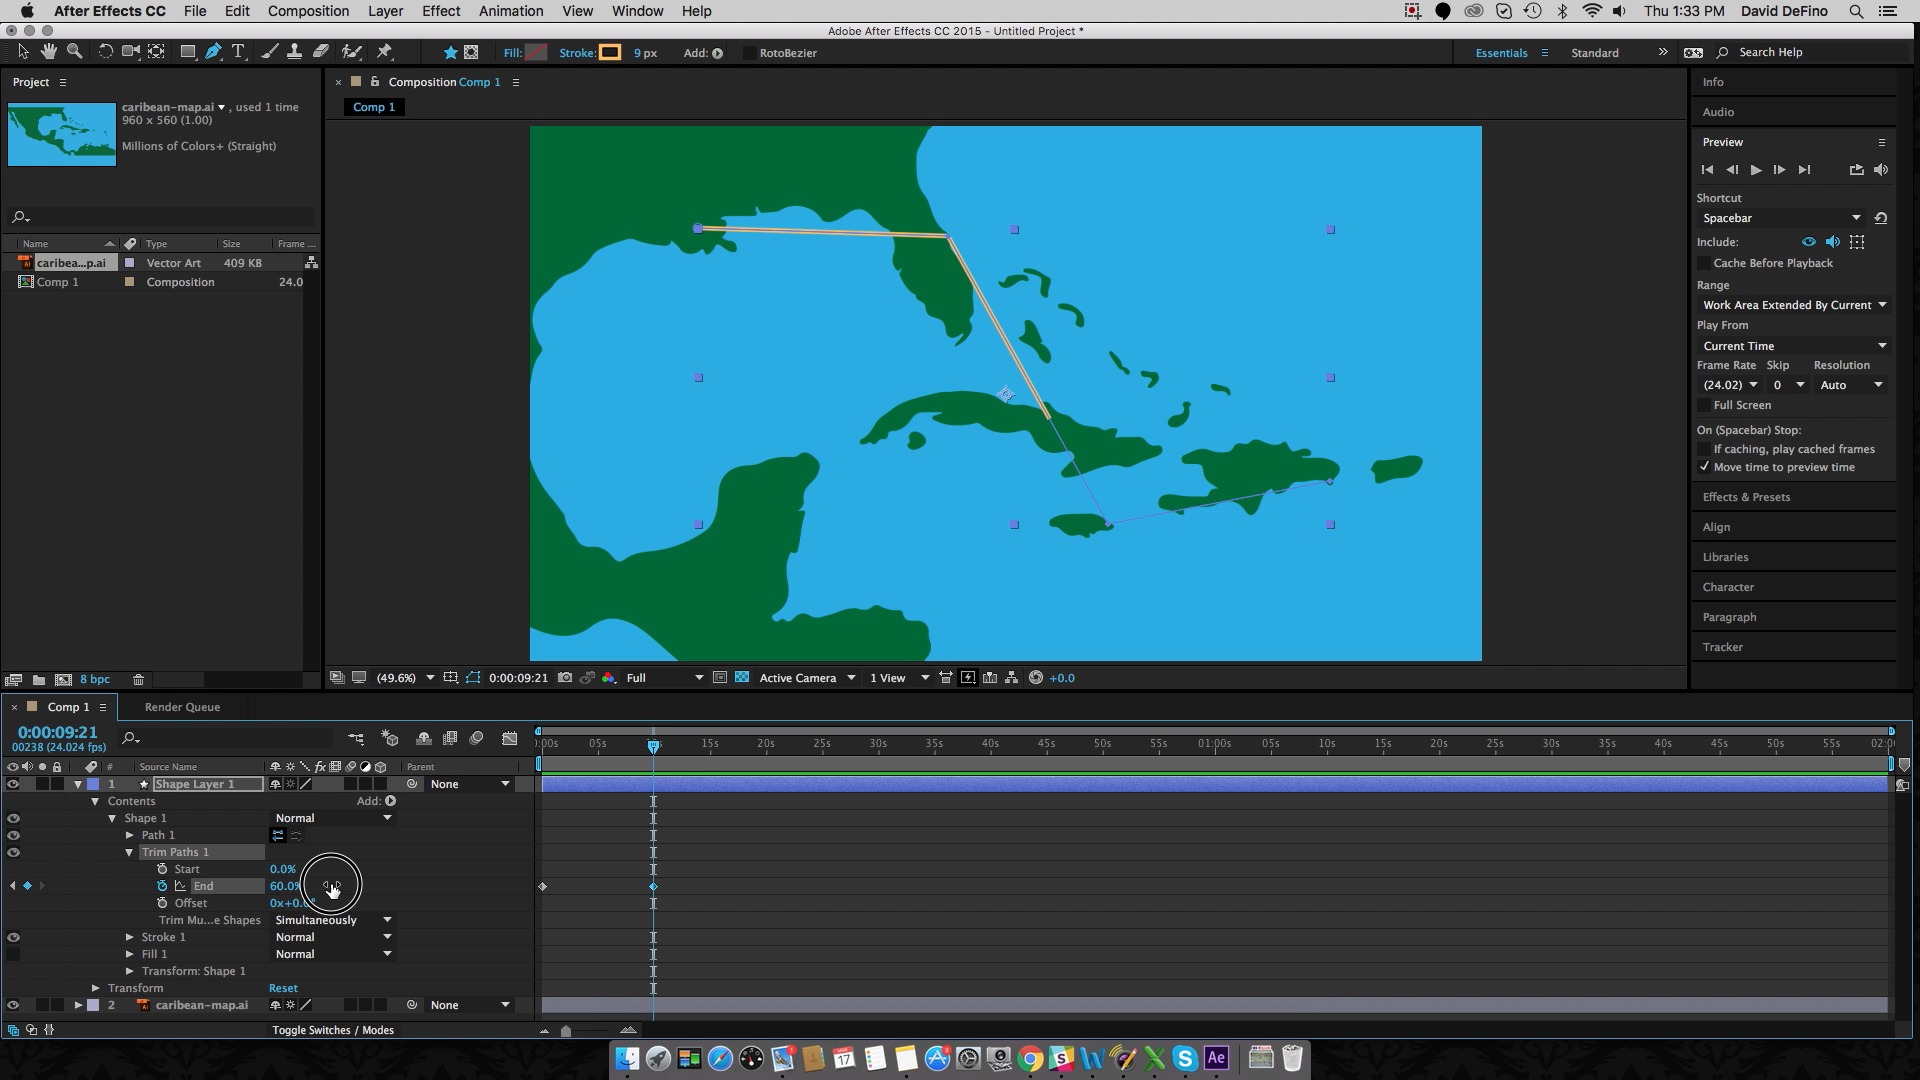
Next, you want to create a new shape layer. Then, using the pen tool, you want to create your path. Once you have your path laid out, you can go into your layer, and click “add > Trim Paths”. This will give you a “end” that is keyframe-able. From here you simply make the start of your animation 0%, and the end of your animation 100%.
 Next, you want to precompose these layers, and then scale them up in the new comp, (don’t forget to click the “continuously rasterize” button). Set position keyframes to follow your path around the map.
Now, if you are just trying to do the “Indiana Jones” thing, then you are done. Add some circles at your turn points that go from 0-100% opacity when your path crosses them, and overlay a stock shot of a plane flying.
Things to make your map better.
There are several things that I like to do to make my maps better. You can utilize some of these techniques, or add in your own. The choice is yours.
 Adding a vehicle
Something that is not necessary, but looks cool, is adding the vehicle your hero is using to the flight path. For the example shown, I added a silhouette of a DC3 airplane. I used a vector file, but considering the size it will be displayed at, this isn’t necessary.
Once you scale your vehicle, go to your shape layer and edit > copy the shape layers path. Then, go back to your vehicle layer and edit > paste. This will add the points on your shape layer to position keyframes on your vehicle layer. Adjust the time of the movement by dragging the last keyframe (and the rest will follow).
Next, you want to go to Layer > Transform > Auto-Orient. This will orient your vehicle along the flight path. Rotate the vehicle to the proper orientation to start, and you are good to go.
Adjusting your path line
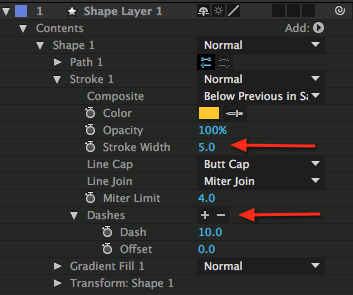 In the example video, I make my path line thiner, and turn it into dashes. Both of these are accomplished in the drop down of the shape layer. The “Stroke Width” (under “stroke) adjusts the thickness of the line. On the “Dashes” line, you can add dashes by clicking the “+”. You can also change your path color here if you so choose.
Adding Texture
Although the flight path animation looks great as is at this point, I prefer to add a paper texture to give the map a “real world” look. You can find paper textures anywhere on line (just google paper lecture in image search). Try to use high res textures. If you have a high enough resolution texture, put it inside the pre comp so that the texture stays stationary during the move. For this example, I did not do that.
Place the texture over your image, and change the blending mode to whatever works best for your image (I used “overlay”).
Completing Your Project
At this point everything is aesthetic. You can add some text layers to identify places your flight path goes through. You can overlay a shot of the vehicle traveling. You could even overlay a shot of your hero sitting in the airplane reading a newspaper if you would like. The choices are unlimited.
Did I miss anything? Is there anything you would do differently? Let us know in the comments below!